Step 1: Visit the GST Portal
Go to the official GST website at gst.gov.in.

Step 2: Navigate to Registration
Click on the ‘Services’ tab, select ‘Registration,’ and then click on ‘New Registration.’
Step 3: Fill in Part A
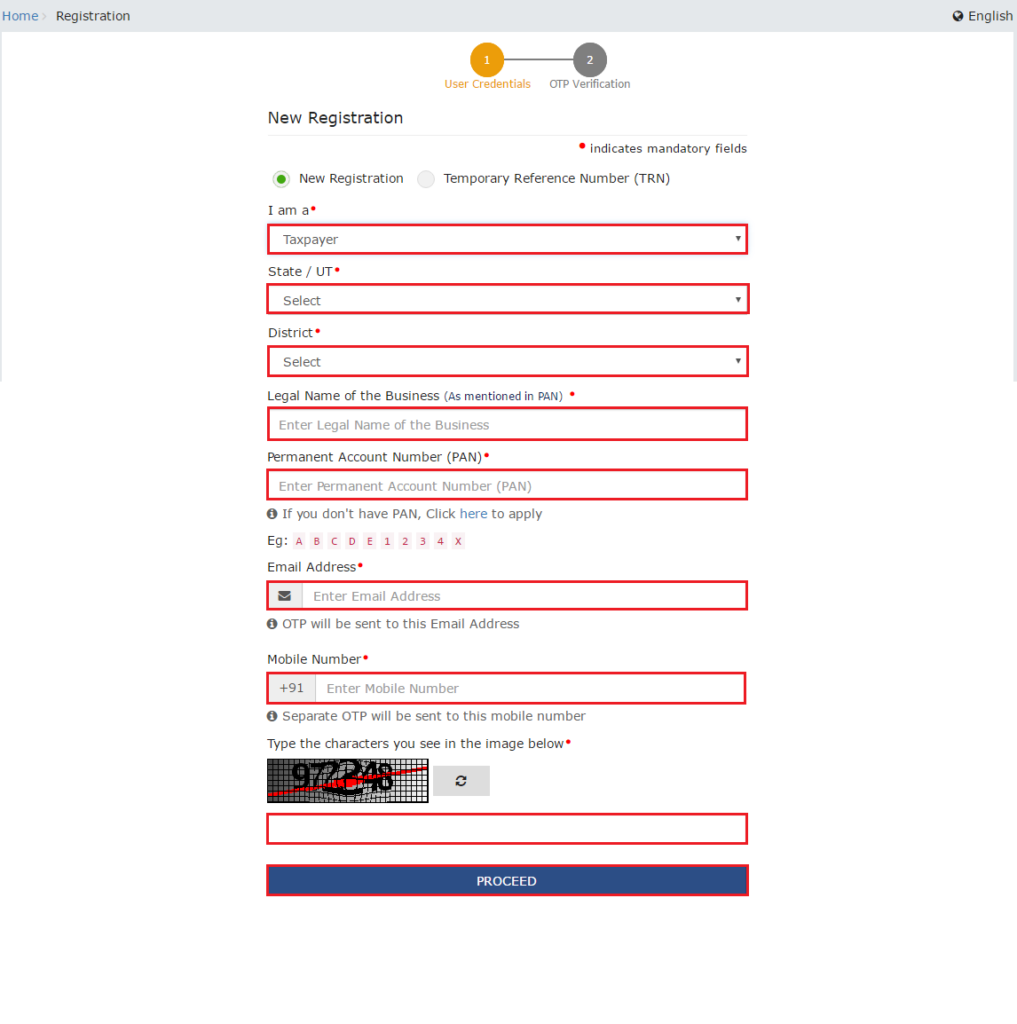
Enter the following details:
- Choose the “New Registration” option.
- Select “Taxpayer” from the drop-down menu.
- Choose your State and District.
- Enter your Business Name and PAN.
- Provide your Email Address and Mobile Number.
You’ll receive OTPs on the registered email and mobile.

Step 4: Obtain Temporary Reference Number (TRN)
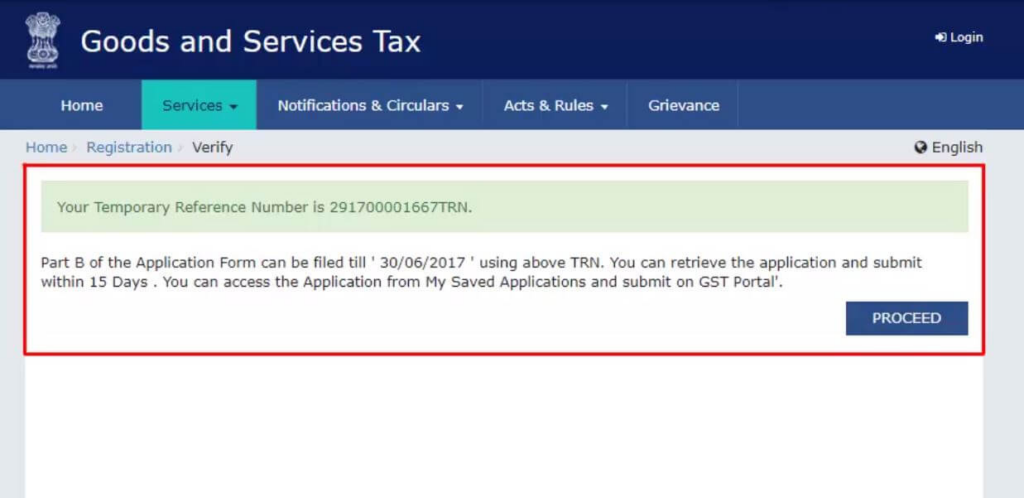
After entering the OTPs, you’ll receive a 15-digit TRN. Note this down as you’ll need it later.
Step 5: Start Part B Registration
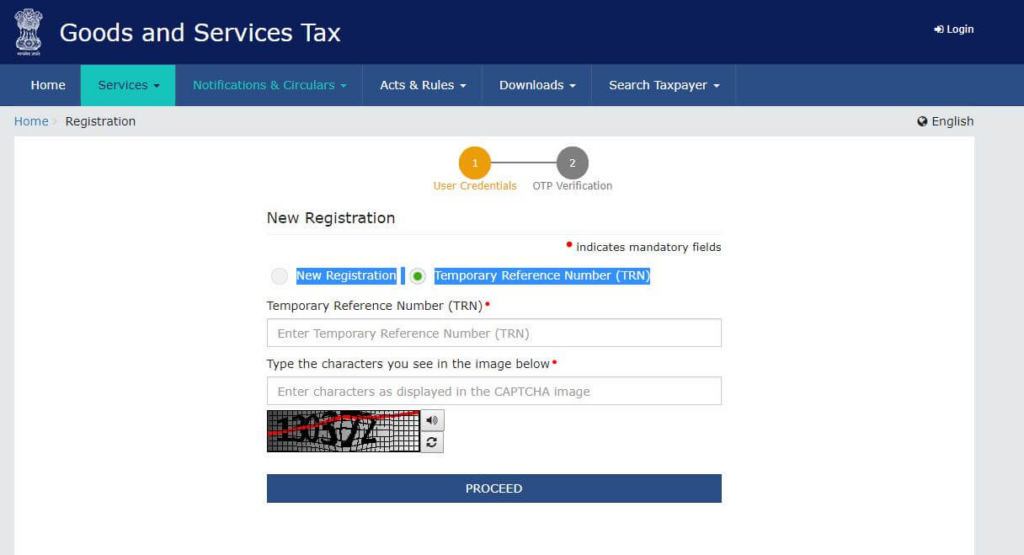
Go back to the GST portal and select ‘New Registration’ again. Choose “Temporary Reference Number (TRN)” and enter your TRN.
Step 6: Enter OTP
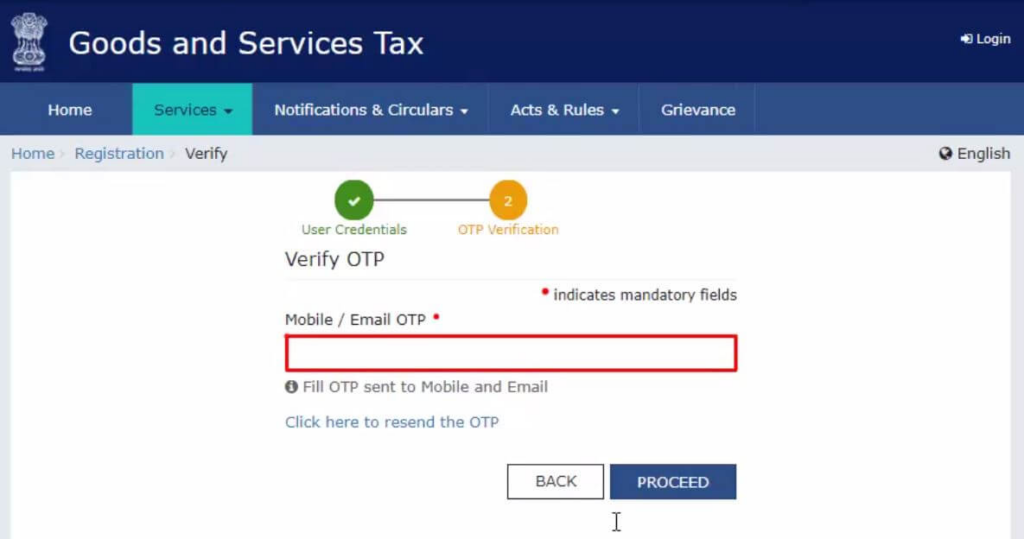
You’ll receive another OTP on your registered mobile and email. Enter the OTP to proceed.
Step 7: Access Draft Application
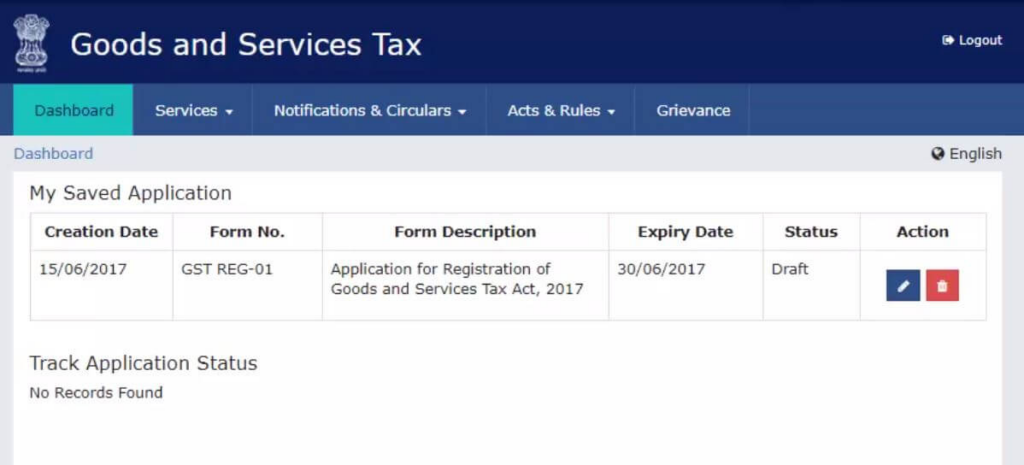
Once logged in, you’ll see the application status as drafts. Click the edit icon to continue.
Step 8: Complete Part B of the Application

Part B has ten sections. Fill in all required information and upload necessary documents.
Here’s what you need:
- Photographs
- Constitution of the taxpayer
- Proof for the place of business
- Bank account details (optional)
Step 9: Enter Business Details

Provide your trade name, business constitution, and district.
Indicate if you opt for the composition scheme and choose the type of registered person.
Step 10: Complete Promoters/Partners Details
Input details for up to 10 promoters or partners, including name, address, and identity details like PAN and Aadhaar numbers.
Step 11: Add Authorised Signatory

Enter the details for your authorized signatory, similar to the previous step.
Step 12: Provide Principal Place of Business Details

Enter your principal place of business address, contact number, and nature of possession. Upload supporting documents as needed.
Step 13: Fill Goods and Services Details
Enter details of goods and services along with their HSN codes or SAC.
Step 14: Enter Bank Details
Input details for your bank accounts. Submission of this information is optional at the time of registration.
Step 15: State-Specific Information

Provide any state-specific information required, such as professional tax details.
Step 16: Choose Aadhaar Authentication
Decide whether to opt for Aadhaar authentication. This can simplify the verification process.
Step 17: Verification Section

Review all entered details, tick the declaration box, and submit the application using one of the following methods:
- Companies/LLPs must use DSC.
- Use e-Sign for OTP to Aadhaar registered number.
- Use EVC for OTP to registered mobile.
Step 18: Application Acknowledgment

You’ll receive a confirmation message and an Application Reference Number (ARN) via email and SMS.
Step 19: Check ARN Status
To check your GST registration status, enter your ARN on the GST portal.
